Monday, May 12, 2014

Coconut Vanilla Cupcakes with Pink Coconut Lime Glaze

I have made the Coconut Vanilla Cupcakes on this blog many times... but hubby always complains they are not quite sweet enough, so I have done some tweaking... and tried out a new icing. 

Coconut Vanilla Cupcakes with Pink Coconut Lime Glaze


Coconut Vanilla Cupcakes

Makes 12-16 cupcakes, depending on the size of your cupcake papers. Suitable for freezing. 
  • 6 eggs
  • 100g (125ml) coconut oil or 100g butter, melted
  • 250g  (3/4 cup) rice malt syrup
  • 1 tablespoon vanilla extract
  • ¼ teaspoon liquid stevia (optional)
  • ½ (75g) cup coconut flour
  • ¼ teaspoon bicarb soda
  • pinch of salt (omit if using salted butter)


  1. Preheat oven to 180 degrees Celcius. Prepare cupcake tray by lining with paper cupcake cases or greasing with oil or butter. (Tip: Double up your cupcake papers if you want them to look pretty after baking.)
  2. Beat eggs and add coconut oil, rice malt syrup, vanilla extract and stevia. Beat to combine. 
  3. Add dry ingredients (coconut flour, bicarb soda and pinch of salt). Blend until smooth. (You can beat it by hand or use electric beaters or a blender.) 
  4. Pour into well greased muffin tins or into paper cupcake cases and fill to 1cm from the top. The mixture is very runny - I find it easiest to transfer it to a jug and pour it in. 
  5. Bake at 180 degrees Celcius for 20-25 minutes or until skewer comes out clean. Turn off the oven but leave the cupcakes in another 20-30 minutes if you have the time. This will allow them to turn golden and taste more caramel without overcooking. Allow to cool and then chill in fridge before icing. 


Pink Coconut Lime Glaze 

  • 1/3 cup (75g) warmed coconut butter (made from blended shredded coconut or coconut flakes)*, in a pour-able state. (The oil can separate out - make sure it is mixed in to the rest of the coconut butter.)
  • 1/4 cup (60ml) rice malt syrup
  • 2 teaspoons lime juice
  • ½ teaspoon vanilla extract or half a vanilla pod, scraped
  • 1 tablespoon juice squeezed from raspberries (I warm frozen raspberries and push through a sieve to extract juice... Or you could just add food colouring if you don't mind eating that.) 

  1. In a small bowl, mix the coconut butter and rice malt syrup till they form a thick paste. 
  2. Stir in the vanilla, raspberry juice and lime juice.
  3. If needed, stir in some filtered water till desired consistency is achieved. 
  4. Pour onto chilled cupcakes. Spread a little if needed, but you want it to spread out itself a little to look silky smooth. 

This glaze is not a family favourite, but is what I had iced the cupcakes with when several friends requested the recipe. The coconut-lime flavour complements the coconut cupcakes nicely, but is not near as sweet as typical cupcake icing, and it tastes a little grainy due to the texture of coconut butter. 

*Sometimes Woolworths sells coconut butter – it is labelled “Spiral Foods Coconut Paste” and comes in a box of 5 sachets. You can probably find it at a health food shop too. To make your own coconut butter, throw a whole packet (I use 500g) of desiccated coconut into a food processor and blitz until it turns runny. It may take around 15 minutes, and you will probably need to scrape the sides of the bowl several times. NOTE: You need to make a large quantity of coconut butter for the food processor to handle it. There are plenty of ways to use it up! 

Chocolate Sweet Potato Brownies


Chocolate Sweet Potato Brownies


Unsurprisingly, when you try to make brownies that are not laden with sugar and empty calories from white flour, they no longer taste that much like brownies. I have tried brownies made from almond or hazelnut meal and brownies made from coconut flour, and while they are nice, they are more like chocolate slices or cakes, and not really worthy of Brownie status. 
Surprisingly, when you use sweet potato as the basis for a brownie, it comes a lot closer to what you expect of a brownie: dense, moist and delicious. And, being made from real foods without added nasties, I'm happy to let my kids have a piece when they catch me sneaking some. 
I have been adding chocolate extract to my chocolatey baked goods since reading what dessert guru David Lebovitz has to say about chocolate and chocolate extract. Similar to vanilla extract, pure chocolate extract is made by infusing cacao beans (rather than vanilla beans) in an alcohol solution. When you add a tiny amount to a chocolate recipe, it boosts the chocolate flavour dramatically. Making chocolate treats without actual chocolate blocks/bars/chips or cane sugar, something seems a little lacking to me, and chocolate extract fills the lack. 
Chocolate flavoured extract exists. I've bought it, tried it, thrown it out. If you can get your hands on some chocolate extract actually made from real cocoa/cacao, buy it. And buy some more for me too. I have been using Stonemill Natural Chocolate Extract, which Aldi stocked (as a once off thing), and its ingredients are: Water, Vanilla Extract (Water, Alcohol, Vanilla Beans), Chocolate Concentrate (40%) [Water, Alcohol, Alkalised Cocoa Powder (25%)]. Contains 35% alcohol by volume. Not exactly made from whole cocoa beans, but at least made from a real chocolate product, and it is GOOD. 
If you are interested in chocolate extract, the online Australian store Premium Gourmet Food sells some... David Lebovitz recommends Star Kay White brand... Nielsen Massey is another brand... And if you want to try making your own chocolate extract, give this Instructables recipe a go (and then give me some feedback!). And here are some other recipe ideas for using your chocolate extract! 


Chocolate Sweet Potato Brownie
Adapted from recipes by Eat Drink Paleo and The Paleo Scoop

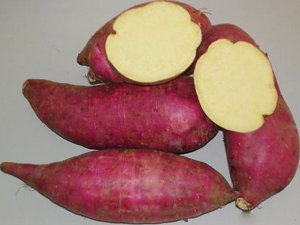
  • 1 medium peeled white sweet potato (purple/red skin), steamed or boiled (weighing approx 250g after peeling, or 300g before peeling)
  • 150ml (125g) coconut oil, butter or mild flavoured oil of your choice
  • 150ml (240g) rice malt syrup
  • 2 tsp vanilla extract
  • 1 tsp chocolate extract (optional)
  • ¼ tsp liquid stevia (optional, or substitute powdered stevia)
  • 2 eggs
  • 1 tsp baking powder
  • 1 tsp bicarb soda
  • 1/3 cup (41g) cocoa powder (I used dutch processed cocoa)
  • 2 Tbs (30g) coconut flour

Instructions

  1. Steam or boil peeled sweet potato if you haven’t already – I cut mine into chunks and cook in the microwave with a little water in a covered microwave-proof dish. Alternatively you could bake the sweet potato in its jacket and then scoop the flesh out.
  2. Preheat oven to 180 °C (365 °F).
  3. Blend sweet potato with the oil/butter until smooth (or you can mash it really well). Ensure it has cooled enough that it won’t cook the eggs when they are added next.
  4. Add rice malt syrup, vanilla, chocolate extract, stevia and eggs to blender/food processor with cooled sweet potato and blend till well incorporated (or mix well by hand). 
  5. Add baking powder, bicarb soda and cocoa powder and blend in, and finally mix in the coconut flour. (Avoid adding too much coconut flour as it will absorb too much moisture, which will result in drier brownies.)
  6. Transfer the mixture into a 20x20cm (8”x8”) greased baking tray (I use a silicon tray). It will hold its shape while cooking, so be sure to spread it out evenly. Cook for 25-30 minutes or until a skewer comes out clean.
  7. Cool for 5-10 minutes before carefully removing from tin. Allow to cool right down before cutting to avoid jagged edges. 


This would be a really easy recipe for a Thermomix, I imagine - you could cook the sweet potato in it, then blend it up and blend in the rest of the ingredients. 

Sorry about the lack of photos - I must remember to take some next time I make these! 

Monday, May 6, 2013

Meltaway shortbread cookies

These shortbread-like biscuits have almost become a pantry staple in our house, where, thanks to the 3 year old, they have become known as "circle bikkies", despite being only roughly round. They are more circle-shaped than "egg bikkies" (oval-shaped milk arrowroot biscuits) and Tiny Teddies, hence the name. ;-)

This recipe was adapted from the Meltaway Cookie recipe on Landee See, Landee Do, where the blogger ices them with enticing-looking cream cheese icing, but I have never felt the need to make these any sweeter. If you wanted to make the icing you could simply substitute dextrose for the powdered sugar at a 1:1 ratio. 


Meltaway shortbread cookies (AKA "circle bikkies")

Makes about 40 cookies, fitting on 3 large trays. 

  • 250g butter (salted, or add a pinch of salt if using unsalted butter)
  • 3/4 cup cornflour (cornstarch)
  • 3/4 cup dextrose
  • 1 cup plain (all purpose) flour


In a medium bowl, cream the butter until fluffy. Add cornflour and dextrose and blend well. Beat in flour until thoroughly mixed. Drop by small teaspoons onto baking sheet and flatten out with the bottom of a glass, dipping the glass in dextrose each time to prevent sticking. Bake at 180C for 10-12 minutes or until just starting to brown. Allow to cool before storing in airtight container. 


Friday, March 29, 2013

Orange chocolate truffles

Has anyone noticed this blog has quite a chocolate theme?! Cutting out fructose has left me seeking my chocolate fix in ways not involving the consumption of chocolate blocks... but it hasn't stopped me wanting it. I've heard that women crave chocolate because they need magnesium, so I guess a simple fix could be to take magnesium supplements... but that doesn't sound quite as appetising as chocolate! 

I have had numerous attempts to make a satisfactory chocolate, but nothing has quite cut it... until these truffles. I've tried chocolate variations using unsweetened baker's chocolate (AKA cacao liquor), raw cacao powder, and normal baking cocoa powder; I've mixed them with cacao butter and coconut oil (bleurgh); I've sweetened them with rice malt syrup, dextrose-based syrup and stevia; I've added vanilla and/or coffee to try to compensate for the lack of flavour. I've found that using unsweetened chocolate (I have some Baker's Unsweetened Chocolate a friend kindly brought back from USA) or raw cacao powder result in an overpowering, bitter chocolate taste (like licking cocoa powder off the spoon), which is difficult to mask. And the chocolate is either waxy or chewy. 

For my first couple of attempts making these truffles I used Nestle baking cocoa powder, then raw cacao powder, and both were very nice, but VERY dark tasting and a little on the bitter side, and I added extra sweetening to compensate. I have now discovered that using the less acidic dutch processed cocoa powder results in a friendlier chocolate. Yes, raw cacao powder may have more magnesium and other minerals to benefit my body, but when it comes to chocolate it's the taste buds I aim to please. ;) (And from what I've read, raw cacao powder doesn't strictly meet the requirements for raw food anyway, if you're concerned about that sort of thing.)

You could try using this chocolate coating recipe to make eating chocolate or choc chips for baking if you like... It is not my ideal chocolate by a long shot, but it is the best fructose-free option I have discovered, and I'm happy enough for it to coat these extremely delicious orange truffles. OR you could coat the truffles in 85% cocoa chocolate, or some store-bought fructose-free chocolate such as Plamil's No Added Sugar Organic Chocolate (which I got from Flannery's). 


Makes about 18 truffles

Truffle filling
  • 30g (3 tablespoons or 1/4 cup) cacao butter, chopped
  • 2 tablespoons (40ml) coconut oil (I used unrefined, cold-pressed extra virgin coconut oil, which has quite a coconut flavour, but is not noticeable in these truffles)
  • 1/4 cup (60ml) rice malt syrup
  • 2 tablespoons (40ml) coconut butter (make a batch of this first, if you haven't made it in advance)
  • 1/2 cup dutch processed cocoa powder (I used Nestle Plaistowe premium cocoa. You can use normal baking cocoa powder or raw cacao powder, but the truffles will have more of a bitter taste and you may wish to add more sweetening to compensate.)
  • 1 teaspoon vanilla extract
  • 1/4 cup (3 tablespoons) strained fresh orange or mandarin juice (takes about 1/2 a large orange)
  • 1 teaspoon orange or mandarin zest (from 1 large orange)
  • 5 drops liquid stevia (optional. Adjust to taste.)
  • pinch of sea salt 


Chocolate coating
  • 25g (2 ½) tablespoons cacao butter
  • 3 ½ tablespoons cocoa powder (I haven't successfully made the coating with dutch processed cocoa yet – it seized and I have run out of the cocoa powder – but assuming it wasn't the type of cocoa powder that caused it to seize, I would recommend dutch processed cocoa for flavour. I have successfully made the coating with raw cacao powder.)
  • 1 tablespoon rice malt syrup, warmed till very runny
  • ¼ teaspoon vanilla extract
  • 5 drops liquid stevia


Directions

Make a batch of coconut butter if you don't have any on hand by throwing a whole packet (I use 500g) of dessicated coconut into a food processor and blitzing until it turns runny. It may take around 15 minutes, and you will probably need to scrape the sides of the bowl several times. NOTE: You need to make a large quantity of coconut butter for the food processor to handle it. There are plenty of ways to use it up! Don't worry about cleaning your food processor yet as you are going to put the coconut butter back in shortly with other ingredients.

Place the 30g cacao butter in a double boiler over the boiling water. Stir for 1-2 minutes until it has started to melt, but there are still some solid pieces. Turn off the heat, then whisk in the 2 Tbs coconut oil and 60ml rice malt syrup.

Pour the mixture into a food processor, then add the ½ cup cacao powder, 2 Tbs coconut butter, 1 tsp vanilla, ¼ cup orange juice, 1 tsp zest, 5 drops stevia and small dash of salt. Process for about a minute until your mixture is smooth and thick.

Refrigerate truffle mixture for 45 minutes.

After the truffle mixture has chilled, use a spoon to scoop out balls (about 1/2 or 2/3 of a tablespoon in size) from the bowl. Roll them between your palms to form smooth balls. (Use disposable food handling gloves if you'd rather not get your hands messy! Alternatively, rub some coconut oil onto your hands to stop the chocolate sticking too much.) Place the balls on a tray lined with baking paper and refrigerate at least 15 minutes. Be careful not to roll the balls too much or the heat from your hands can melt the chocolate.

For the chocolate coating, melt the cacao butter over a double boiler until it reaches 50 degrees Celsius (122F). Take care no water or steam (from the double boiler or elsewhere) gets into the bowl at any stage, else the chocolate will seize.

Add the warmed rice malt syrup, vanilla, stevia and cocoa powder. Mix until all combined and the mixture reaches 50 degrees Celsius again.

Remove the chocolate from heat and allow to cool slightly. Take the truffles out of the fridge and dip each truffle in the chocolate (or hold the truffle over the melted chocolate – you can use a toothpick – while spooning the melted chocolate over it). Place truffles on a fresh sheet of baking paper on the refrigerated tray and allow them to cool and harden at room temperature before storing in the fridge.


Yeah, I used to think that making truffles by mixing chopped chocolate with cream was fiddly. Well, these are totally worth the fiddling in my opinion! Yum! 


Excuse the daggy photo - I may take a better one someday, but in the meantime, check out the pretty pictures from the original Mandarin Chocolate Truffle recipe. :)

Monday, March 18, 2013

Coconut Vanilla Cupcakes

I have probably made these cupcakes (or variations of them) more than any other recipe in my entire life.  This has been adapted from a few different recipes, and I have made many different variations just using the same basics of coconut flour and eggs.  It's hard to go wrong with these two key ingredients!  Just note with coconut flour that a little goes a long way - you definitely don't need the same sort of quantities that you would use with wheat flour. 

This version is gluten free as well as fructose free, and if using coconut oil (and no cream cheese icing) it is also dairy free - all of which come in useful in our extended family with all sorts of food intolerances.

These cupcakes are beautifully moist and dense. They have received compliments from so many people who had no idea that they were fructose or gluten free.  And as with most coconut flour recipes, they actually get better after a couple of days in the fridge - they keep really well for at least 5 days or so, and they freeze great too.


(with blueberry cream cheese icing)


Coconut vanilla cupcakes

(makes 12)

6 eggs
1/2 cup coconut oil or butter
1/2 cup rice malt syrup
1 Tbsp vanilla extract
1/2 cup coconut flour
pinch of salt
1/4 tsp baking soda

Beat eggs and add coconut oil, syrup and vanilla. Beat to combine.

Add dry ingredients. Blend with a hand mixer until smooth.

Pour into well greased muffin tins or into cupcake papers.

Bake at 180 degrees Celcius for 20 minutes.


These go with lots of different icings and fillings, but my favourite is cream cheese icing.


Cream Cheese Icing

250g cream cheese
100g butter (optional)
Dextrose or rice syrup to taste (around 1/2 to 1 cup)
Vanilla extract

Soften cream cheese and butter and mix until smooth. Add dextrose and vanilla and mix to combine.


Some variations I have tried to this recipe:

Lemon and coconut - add lemon rind, lemon juice and dessicated/shredded coconut

Raspberry and white chocolate - add fresh or frozen raspberries and white chocolate drops (make your own out of cocoa butter and sweetener for a fructose free version), and use melted cocoa butter instead of butter in the icing for an extra chocolate-y taste

Strawberry and dark chocolate - add a whole strawberry (I used tinned ones in the middle of winter) and a piece of 70% or 85% Lindt chocolate to the centre before baking - particularly nice to eat straight from the oven without any icing, and a great easy dessert to whip up at the last minute :-)

Mango and cream cheese - add a slice of mango and chunk of cream cheese to the centre instead of icing

And pretty much anything else you can think of! Coconut flour is great to work with because it is quite hard to mess it up! I rarely measure my ingredients, and several times I have completely messed up quantities by doubling the recipe but forgetting to double everything, or deciding to make 18 muffins instead of 12 but accidentally doubling some ingredients instead, and they have always turned out ok!

Enjoy! :-)

Saturday, December 15, 2012

Flourless almond brownie slice

This is from the recipe for Grain-Free Brownie Bites at http://detoxinista.com/2012/03/grain-free-brownie-bites. The only changes I have made are substituting the honey in the original recipe for rice malt syrup to make it low-fructose, and baking it in a rectangular pan instead of mini-muffin cups. Also, the original recipe suggests flax "eggs". I have made this several times using hens' eggs, but last time I used chia gel "eggs", and it tasted great. However, it went really soft and stuck to the serving platter after I had it out of the fridge for a while. I will have to test it again to see whether it is the chia gel that caused this. It is rather fantastic straight out of the freezer though, and holds its shape that way!

To make chia or flax "egg" as a substitute for one lightly beaten egg, soak 1 Tbs chia or freshly ground flax seeds in 1/4 cup (60ml, or 3 tablespoons) of water for 15 minutes. Store in the fridge for up to 2 weeks. You can ground the chia seeds first if you prefer, as they are (just) visible and do give a very slight crunch, but I quite like them (and couldn't be bothered to grind them!). They look much like fig seeds in this brownie. Chia seeds are quite the super-food (packed with protein, omega-3, fibre and antioxidants), and can be used in lots of different ways, if you want to google them!


Flourless almond brownie slice
  • 1 cup blanched almond flour (almond meal)
  • 1/2 cup cocoa powder (I used Van Houten brand)
  • 1/2 cup rice malt syrup (original recipe used honey)
  • 125g (1/2 cup) melted butter (or coconut oil, but so far I have only tried butter)
  • 3 eggs, lightly beaten (or 3 flax eggs or 3 chia eggs)
  • 1 tablespoon vanilla extract
  • 1/2 teaspoon liquid stevia (optional)
  • 1/2 teaspoon instant coffee dissolved in 2 teaspoons hot water (optional)
  • 1/4 teaspoon bicarbonate baking soda
  • 1/4 teaspoon salt
  • 1/2 cup walnut pieces (optional)

  1. Preheat oven to 180C (350F), and grease and line a 15 x 20cm lamington tin.
  2. In a medium mixing bowl, combine all ingredients except walnuts and mix until a gooey, thick batter forms.
  3. Spoon the batter into the pan and place walnuts on top, if using. (Note: Walnuts make this brownie difficult to cut through!)
  4. Bake for 15-20 minutes. (I had to bake in my slow oven for 25min at 200C.)
  5. Allow to cool in pan before slicing.
These brownies should last a few days stored at room temperature, or you can store them in the freezer for a longer shelf-life. (They're yummy when eaten straight from the freezer, too!)

Vanilla ice cream with homemade condensed milk


Have you ever made that ice-cream sandwich slice where you mix together condensed milk, whipped cream and a crushed chocolate bar, and sandwich it between two layers of malt biscuits? I love it every time, despite the fatty layer it leaves on the roof of your mouth. :D This is that recipe, with a homemade fructose-free condensed milk... minus the chocolate bar and biscuits, but still with the roof-of-the-mouth coating. If you give this a try, hopefully you'll agree with me that it proves it's not just the chocolate and biscuits that make it so good. 


Make condensed milk:
  • 1/2 cup cold water
  • 1 1/3 cups dry milk powder (unsweetened. Maybe double-check that yours is gluten-free if you need that. My Coles brand milk powder lists only milk and soy emulsifier in the ingredients.)
  • 2/3 cup dextrose (NOTE: I have updated this from 3/4 cup to 2/3 cup as it was very sweet.)
  • 1 teaspoon vanilla extract

 Stir milk into cold water.
Microwave on high 45 seconds to 1 minute until steaming, then stir in dextrose & vanilla.
Refrigerate till cool before using.
You can use this condensed milk for other recipes, but I haven't tried it yet myself. It does seem much thinner than the canned stuff. 


After chilling, add
600ml thickened cream

Whip cream and condensed milk together until thick, then transfer to sealed container (at least 1.5L) and freeze.